Lacto-Fermented Pickles

Homemade Pickles in 15 minutes!
Have you ever seen the Andy Griffith episode about Aunt Bea and the pickles? In this classic episode, the grandmotherly homemaker goes on a pickling binge, making jars and jars of not-so-good pickles.
"Kerosene Cucumbers", Barney Fife calls them.
Perhaps it was that episode, but I always had an aversion to making homemade pickles. Canning is not my favorite summer activity, and besides, by the time you boil the life out of vegetables and soak them in vinegar, it does not seem like you are particularly better off than just buying a jar from the store (minus the pesticides and dyes, of course).
But then one summer, I had an inspiration. It really was that, I think. And since that day, we have been enjoying LOTS of homemade pickles that do not taste like kerosene cucumbers, don’t require canning, and are loaded with health. And best of all it only takes about 15 minutes to put a jar together!
The Inspiration
I had started reading a little about lacto-fermentation and learning what it was, but did not know how to apply it beyond the few jars of sauerkraut that I had made (and nobody liked). I had been blessed that year with a bumper crop of cucumbers until even the chickens were getting tired of them, but still I was NOT going to make pickles. One day, however, I was walking through my house and the "I wonder what I'm going to do with these cucumbers" thought went through my mind again.
Suddenly, wham! I knew it! Make lacto-fermented pickles! I had never read about doing such a thing but I immediately checked it out and yes, it is a real thing! I had the first jars going within the day, and we have been enjoying really good homemade pickles ever since.
What is Lacto-Fermentation?
First, what is lacto-fermentation? There are so many good resources on it out there that I will not try to make this an exhaustive presentation of the concept, but in brief, Lacto-fermentation is an ancient method of food preservation using a salt brine and an anaerobic environment (no air). The best thing about this method, besides the ease of it, is that it keeps the food alive, creating a probiotic food. It is considered by many to be the only food preservation method that actually improves the quality of the vegetable being preserved.
Don’t Forget the Garlic!
I like to load these pickle jars up with fresh garlic cloves. It gives the cucumbers a great flavor, and once the pickles have been consumed, then I eat the pickled cloves whole or chop them up on salads. What a great way to enjoy fresh garlic too!

Ingredients and Supplies
Ingredients and Materials:
For one quart pickles you will need:
2-3 fresh cucumbers (pickling cucumbers are always best for texture, but I have used slicing varieties also. The fresher the cucumber, the better the pickle texture)
2 Tablespoons Sea salt (It is very important that it NOT be iodized. Iodized salt will kill the enzymes that keep the food alive, leading to spoilage).
1 quart distilled or sterilized water. (Do not use tap water or spoilage will likely occur).
Sterilized quart jar
6-8 Fresh garlic cloves
4-5 Bay Leaves, Oak Leaves, Muscadine Leaves, and/or Blackberry Leaves. (These add tanins, which help maintain a crisp texture in the cucumbers).
1 teaspoon each of one or more of the following: Peppercorns, Whole Dill Seed, Whole Allspice, Whole Coriander, and/or Mustard Seed.
Optional: Fermenting weight and lid (more info below)

How-To
Dissolve Salt in Distilled Water
In a separate container, place the salt in the water to make the brine. No need to heat the water. As long as it sits a few minutes, the salt will be sufficiently dissolved.
2. Slice Cucumbers 1/4" thick
A mandolin slicer works great, but I do advise the protective "no-cut" gloves (available online). They have made my pickle-making faster and painless. (Steel-blades have a magnetic attraction to my fingers)
3. Discard Blossom Ends
The blossom end of the cucumber contains enzymes which will soften the pickle, so be sure to discard the little end pieces.
4. Place half the garlic cloves and half the seasonings in the bottom of the jar.
The seasoning is very much a matter of taste. My "go-to" is 4-5 peppercorns and about 1/2" teaspoon of dill seed in the bottom of the jar and the same amount in the top of the jar after layering in the cucumbers. I have used the other seasonings also, but prefer a milder flavored pickle.
5. Place 2-3 bay leaves and/or blackberry leaves, or 1 large oak or muscadine leaf in bottom of jar.
These leaves contain tannins, which help keep your cucumbers crunchy. I always use bay leaves because I think they add to the flavor, but since bay leaves are small I usually throw in a couple of oak leaves also. We have wild muscadine and blackberry leaves around our farm too, and I think they give a good flavor as well. Do, of course, make sure of your tree's identity, but it is fun to have something to use an oak leaf for, right?
6. Fill the jar with sliced cucumbers.
Pack in the cucumbers as compactly as possible. They will soften and settle with the fermentation process. Leave an inch and a half headspace at the top.
7. Weight the cucumbers.
A little sandwich bag filled with salt and sealed well can serve as a weight. Place it in the jar on top of vegetables to keep them under the liquid. The object of lacto-fermentation is to keep the vegetables SUBMERGED the entire time, as anything in the jar that rises to the top will be subject to mold. If you plan to do any amount of fermenting, I highly recommend the glass fermenting weights sold for this purpose.
9. Add the brine.
Pour in your pre-mixed salt water until the vegetables are completely covered. Some bubbling will occur so leave 3/4" or so headspace between the brine and the top of the jar.
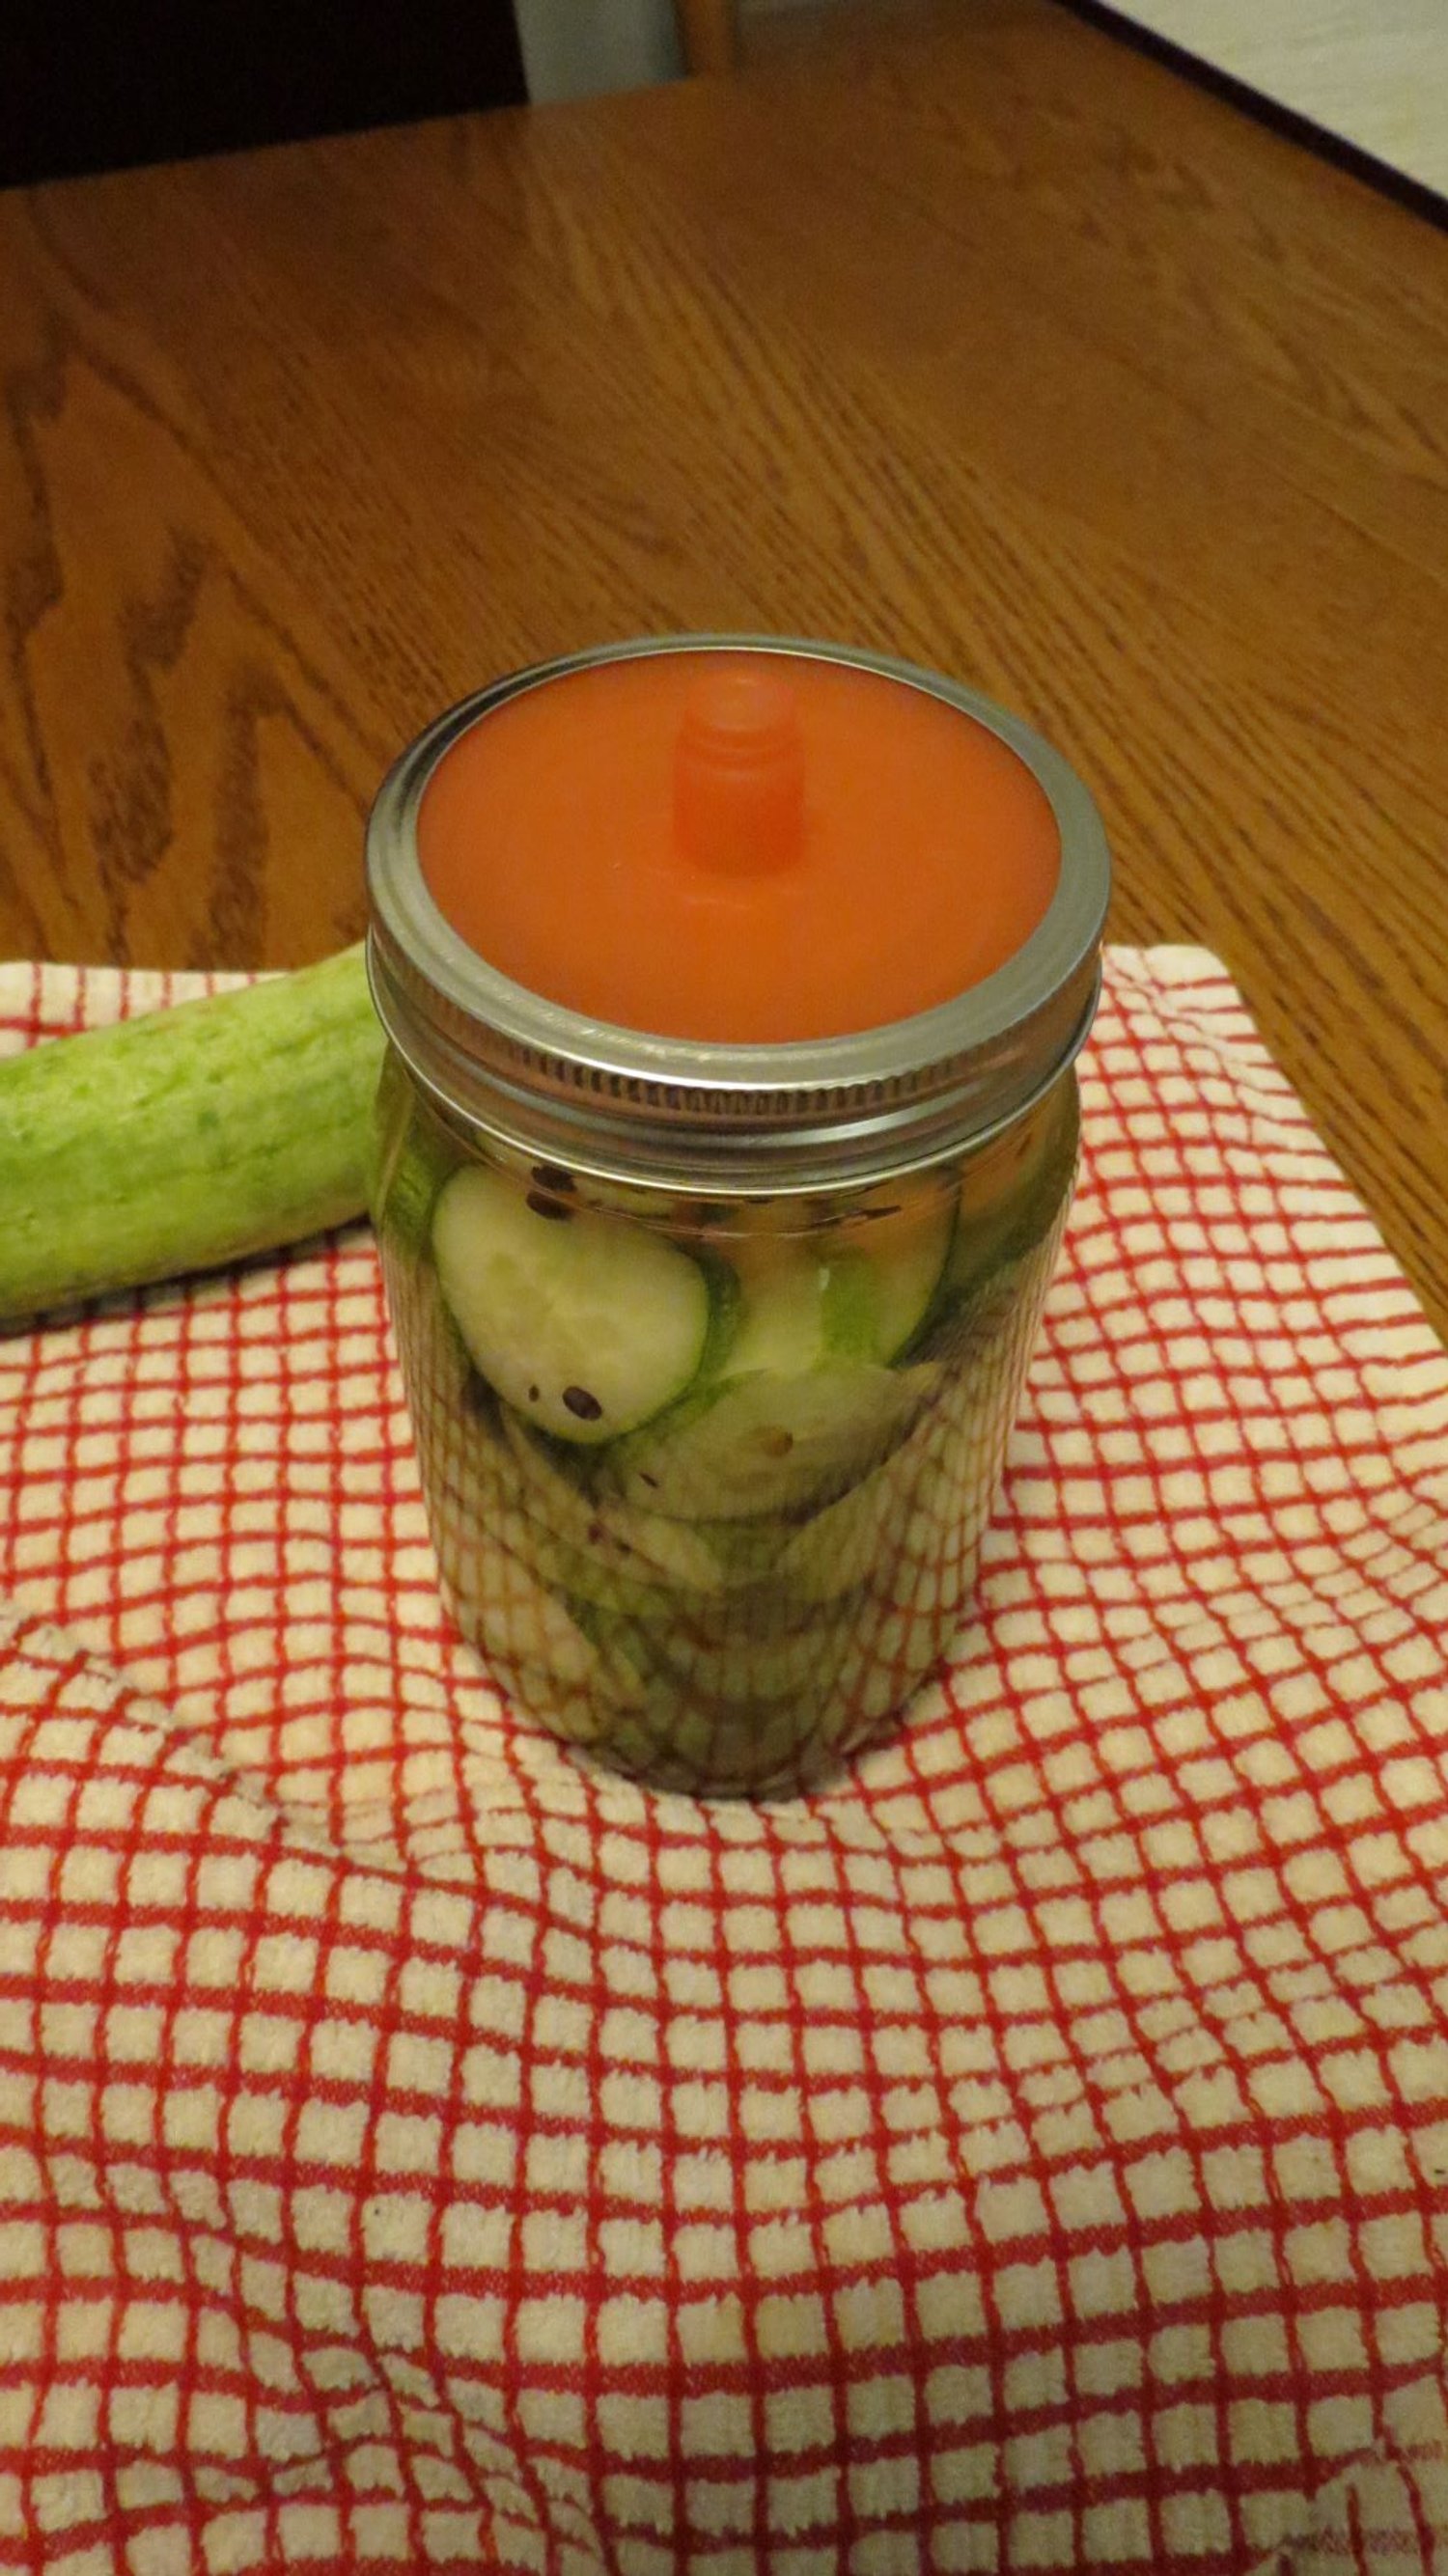
10. Cover the jar.
For experimental purposes, a coffee filter or a clean rag can be secured to the top of the jar. As in the weights, a set of fermenting lids is a wonderful purchase. I would say my fermenting success was about 65% before buying lids. Now it is close to 100%. The jar needs to be covered to keep out dust and dirt, but breathe enough to release the gases as the vegetables ferment.
11. Set the jar at room temperature, out of direct sunlight.
Signs of fermentation include bubble rising to surface, the brine turning cloudy, and the cucumbers interior turning translucent. This usually begins in about 12 hours, depending on the room temperature.
12. Move to refrigerator after approximately 24 hours.
Pickles can be tasted at any stage of the fermenting process. I prefer to set my jar in the refrigerator after about 24 hours. This slows the fermentation process and keeps them from getting too "punchy" for my taste. You can experiment with what time frame you like best. These will not go bad sitting on the counter, but will store longer under refrigeration (up to three months).
Safety Notes:
Lacto-fermentation is generally considered a safer method of food preservation than canning. That being said, pieces of vegetable rising to the surface, or a weight sticking above the water surface, can cause mold to grow. It often appears as a pink or slimy film on the surface and inner rim of the jar. (White bubbles at the surface are normal and no concern). Some fermenters say you can remove the mold from the top and still consume the food, but I prefer to play it safe and discard the batch. After sitting too long on the counter, or after enough months in the fridge, random batches may turn VERY punchy, and I usually have to discard these also. Again, a set of fermenting lids will greatly improve results.
Lacto-fermentation is not a cut and dried formula. Its goal is to foster a healthy environment where the good enzymes and probiotics overpower the bad. It is a work of art to "grow" this living jar of healthy food. If your first try is not successful for some reason, don’t feel badly! We have all had those batches. This is easy and inexpensive enough to try again, and before long you will end up with a refrigerator full of good, homemade pickles that would make Aunt Bea proud!

We’ve shipped garlic all over America
We’d love to add you to our garlic growers map!